
Today, I want to introduce you to something very near and dear to me. I’m about to give you two of the greatest gifts one can give: the gifts of knowledge, and automation.
Apple hid a gem for us, folks. But they really did just that—hid it. Even in the most indirect of ways, like not providing more resources and examples of the cool stuff it can really do. And it’s doing it a great disservice.
I’ve had some time to fiddle around with it since stumbling upon it through its daddy, Automator. It makes sense. It’s not gorgeous. It’s functional, but leaves a lot of room for improvement.
And in order to improve it, people need to use it. In order to use it, people need to see the need for it, and understand how to use it.
So, let me tell you about Apple Shortcuts.
Because it’s one of the best things I think Apple has come out with, and it’s actually been around for quite a while.
What is Apple Shortcuts?
Shortcuts is an incredibly useful app that comes pre-installed on pretty much all Apple devices. (MacOS/iOS/iPadOS/WatchOS/tvOS/visionOS) for streamlining repetitive tasks we find ourselves doing on a daily basis.
I personally love Shortcuts because it’s already on your devices. You don’t have to do a damn thing to start using it—which makes it a great tool for introducing the masses to both automation and programming, since you don’t need to download anything.
Take a second to think about what you do with your phone regularly. It may not be immediately obvious what could be automated, but we’re going to give you plenty of ideas!
Why you haven’t heard of Shortcuts
If Shortcuts is so great, why isn’t it being talked about more? Well, it is, but there’s been some lag in catching on with the majority of the Apple consumer base.
Also… let’s face it, at its core, this is programming. Apple has made programming about as user friendly as it can be without having an interface built by Fischer Price. This interface is akin to the popular Scratch interface for kids to learn programming.
And because it’s programming, it does scare some people off. (I’m a programmer, and programming scares me off. I get it.)
So, we’re still trying to figure out how to “make automation happen” by inspiring the masses with ✨possibilities✨. Based on many discussions I’ve had, users often feel uninspired, or simply don’t know the app is capable of. Once they know, it’s off to the races.
Developers are also lagging on the Shortcuts front, despite there also being massive potential for developer-friendly functionality to speed up workflows. I’ll be writing about this more, because I have quite a few I use regularly in my own workflow both with Shortcuts and other technologies.
BUT: This is the time you want to know about Shortcuts, because it’s officially everywhere.
iOS 18 Beta, coming out in its full version this fall with the new iPhone 16 line release, is loaded with Shortcuts support you’re going to want to know how to use. Even the new Vision Pro VR headset supports Shortcuts, so they are not going anywhere.
The two layers of Apple Shortcuts
Oh, it can do so much. It may not look like it at first, though!
The way I explain it to folks, there are two layers to Shortcuts: the Consumer layer, and the Integration layer. *Those are my terms. I like making up my own terms. ????)
The Consumer layer
I refer to this as the “Consumer” layer, because this is the kind of functionality Apple promotes to their core user base. It’s basic, and it’s largely out-of-the-box/done-for-you.
This is also naturally where most users stop exploring Shortcuts, because it gets advanced from here on out.
On the Consumer layer, you find the flashy actions that Apple users commonly find useful, like:
Clock
- Set timer
Settings
- Turn on Do Not Disturb
- Set brightness
- Set low power mode
- Toggle Bluetooth
- Turn on airplane mode
- Silence phone
- Check battery percentage
Messages
- Send message
- Send email
Apps
- Open app
Music
- Play music
Maps
- Get directions
Health
- Log health sample
- Track steps
- Log meal
Reminders
- Create reminder
With those actions, you can make some pretty powerful stuff happen! For example, some popular options:
- Set a timer for 10 minutes: Quickly set a timer for any duration.
- Turn on Do Not Disturb for 1 hour: Automatically enable Do Not Disturb mode for a specific period.
- Adjust brightness to 50%: Change your device’s screen brightness to a set level.
- Send a text message to a contact: Automate sending a predefined message to a specific contact.
- Open a specific app: Launch any app with one tap.
- Play a favorite playlist: Start playing a specific music playlist from Apple Music or Spotify.
- Get directions to home: Automatically launch your navigation app with directions to your home.
- Log your water intake: Add a log entry in the Health app to track your water consumption.
- Create a new reminder: Quickly add a new task or reminder with a preset title or time.
- Turn on low power mode: Activate low power mode when your battery reaches a certain level.
- Take and share a photo: Snap a photo and instantly share it with a specific person.
- Send an email with a PDF attachment: Create a shortcut to compose and send an email with a pre-attached file.
- Turn on airplane mode: Automatically toggle Airplane Mode for travel or when needed.
- Start a workout: Begin a workout session with a single tap (integrates with the Workout app).
- Create an event in calendar: Add a new event to your Calendar app for a future date.
- Set a specific wallpaper: Change your device’s wallpaper with one click.
- Get the current weather: Show the current weather conditions in your area.
- Track steps for the day: Display the number of steps you’ve taken that day from the Health app.
- Toggle Bluetooth on/off: Quickly enable or disable Bluetooth on your device.
- Play white noise for sleep: Play a preset audio file of white noise for sleeping or focusing.
- Post a prewritten tweet: Send a predefined tweet from the Twitter app.
- Open a favorite website: Launch Safari and navigate directly to a frequently used website.
- Silence your phone: Automatically mute your phone at a specific time or event.
- Check battery percentage: Display your device’s current battery percentage with one tap.
- Log a meal: Add a new meal to the Health app for nutrition tracking.
The Integration (aka Fun) layer
On the other side are the weirdos (raises hand) working to connect Shortcuts to the internet. Because that’s where the real fun is.
I refer to this as the “Integration” layer, because it’s the functionality that allows us to integrate Shortcuts with other apps and do things it wasn’t necessarily originally directly designed to do.
In short, the functionality is there for you to use—how you use it is up to you! And that is why it’s fun. ????
Whyyyy would you want to connect Shortcuts to the internet? Well, as we weirdos think: Why not?
There’s so much functionality you can add to your workflow, including generative AI capabilities that can truly supercharge your workflow.
Additionally, some apps just don’t have Shortcuts support yet. It’s up to the app developers to add this support through App Intents, not Apple—and many are still slow to catch on, or don’t want to add it for whatever reason.
In that case, we get creative, and try to access that same functionality through their Application Programming Interface, or API.
APIs allow us to tap into the functionality of our apps directly, rather than relying on Apple to do it for us. And some information you’ll want to retrieve on the web couldn’t be retrieved any other way.
What apps can you connect to Shortcuts?
This is just a short list of the apps you can connect to Shortcuts, and what you can do with that app’s data. What kind of functionality could you make use of?
With this functionality, you can utilize the APIs that apps have already set up for their users to access data, and unlock even more cool capabilities than with the Integration layer.
Want to learn more? Read my Introduction to APIs with Apple Shortcuts, the first post in my Extending Apple Shortcuts with APIs series!
The sky is the limit here. For example, I work with businesses to evaluate, optimize, and streamline their own workflows, and the first place I have them start is by looking at the apps they use. Because when it comes to business apps, Shortcuts support is definitely still lacking.
However, their APIs are plenty robust and ripe for the pickin’!
So, we connect them directly, or through Integration as a Service platforms (IaaS) like Zapier or If-This-Then-That (IFTTT).
Exploring Shortcuts
Ok, now that you’ve seen the overview and functionality, maybe you’re excited about what’s possible. Let’s dig in!
But first… we gotta find the damn app. ????
If you’re like me, you may have already shuffled Shortcuts away into a folder, or removed it from your devices altogether. No worries—you can always download it again right from the App Store. If not, you can locate it with a simple Spotlight (⌘+Space) or Siri search.
When you first open the Shortcuts app, you’ll be met with the home screen, highlighting all your Shortcuts.
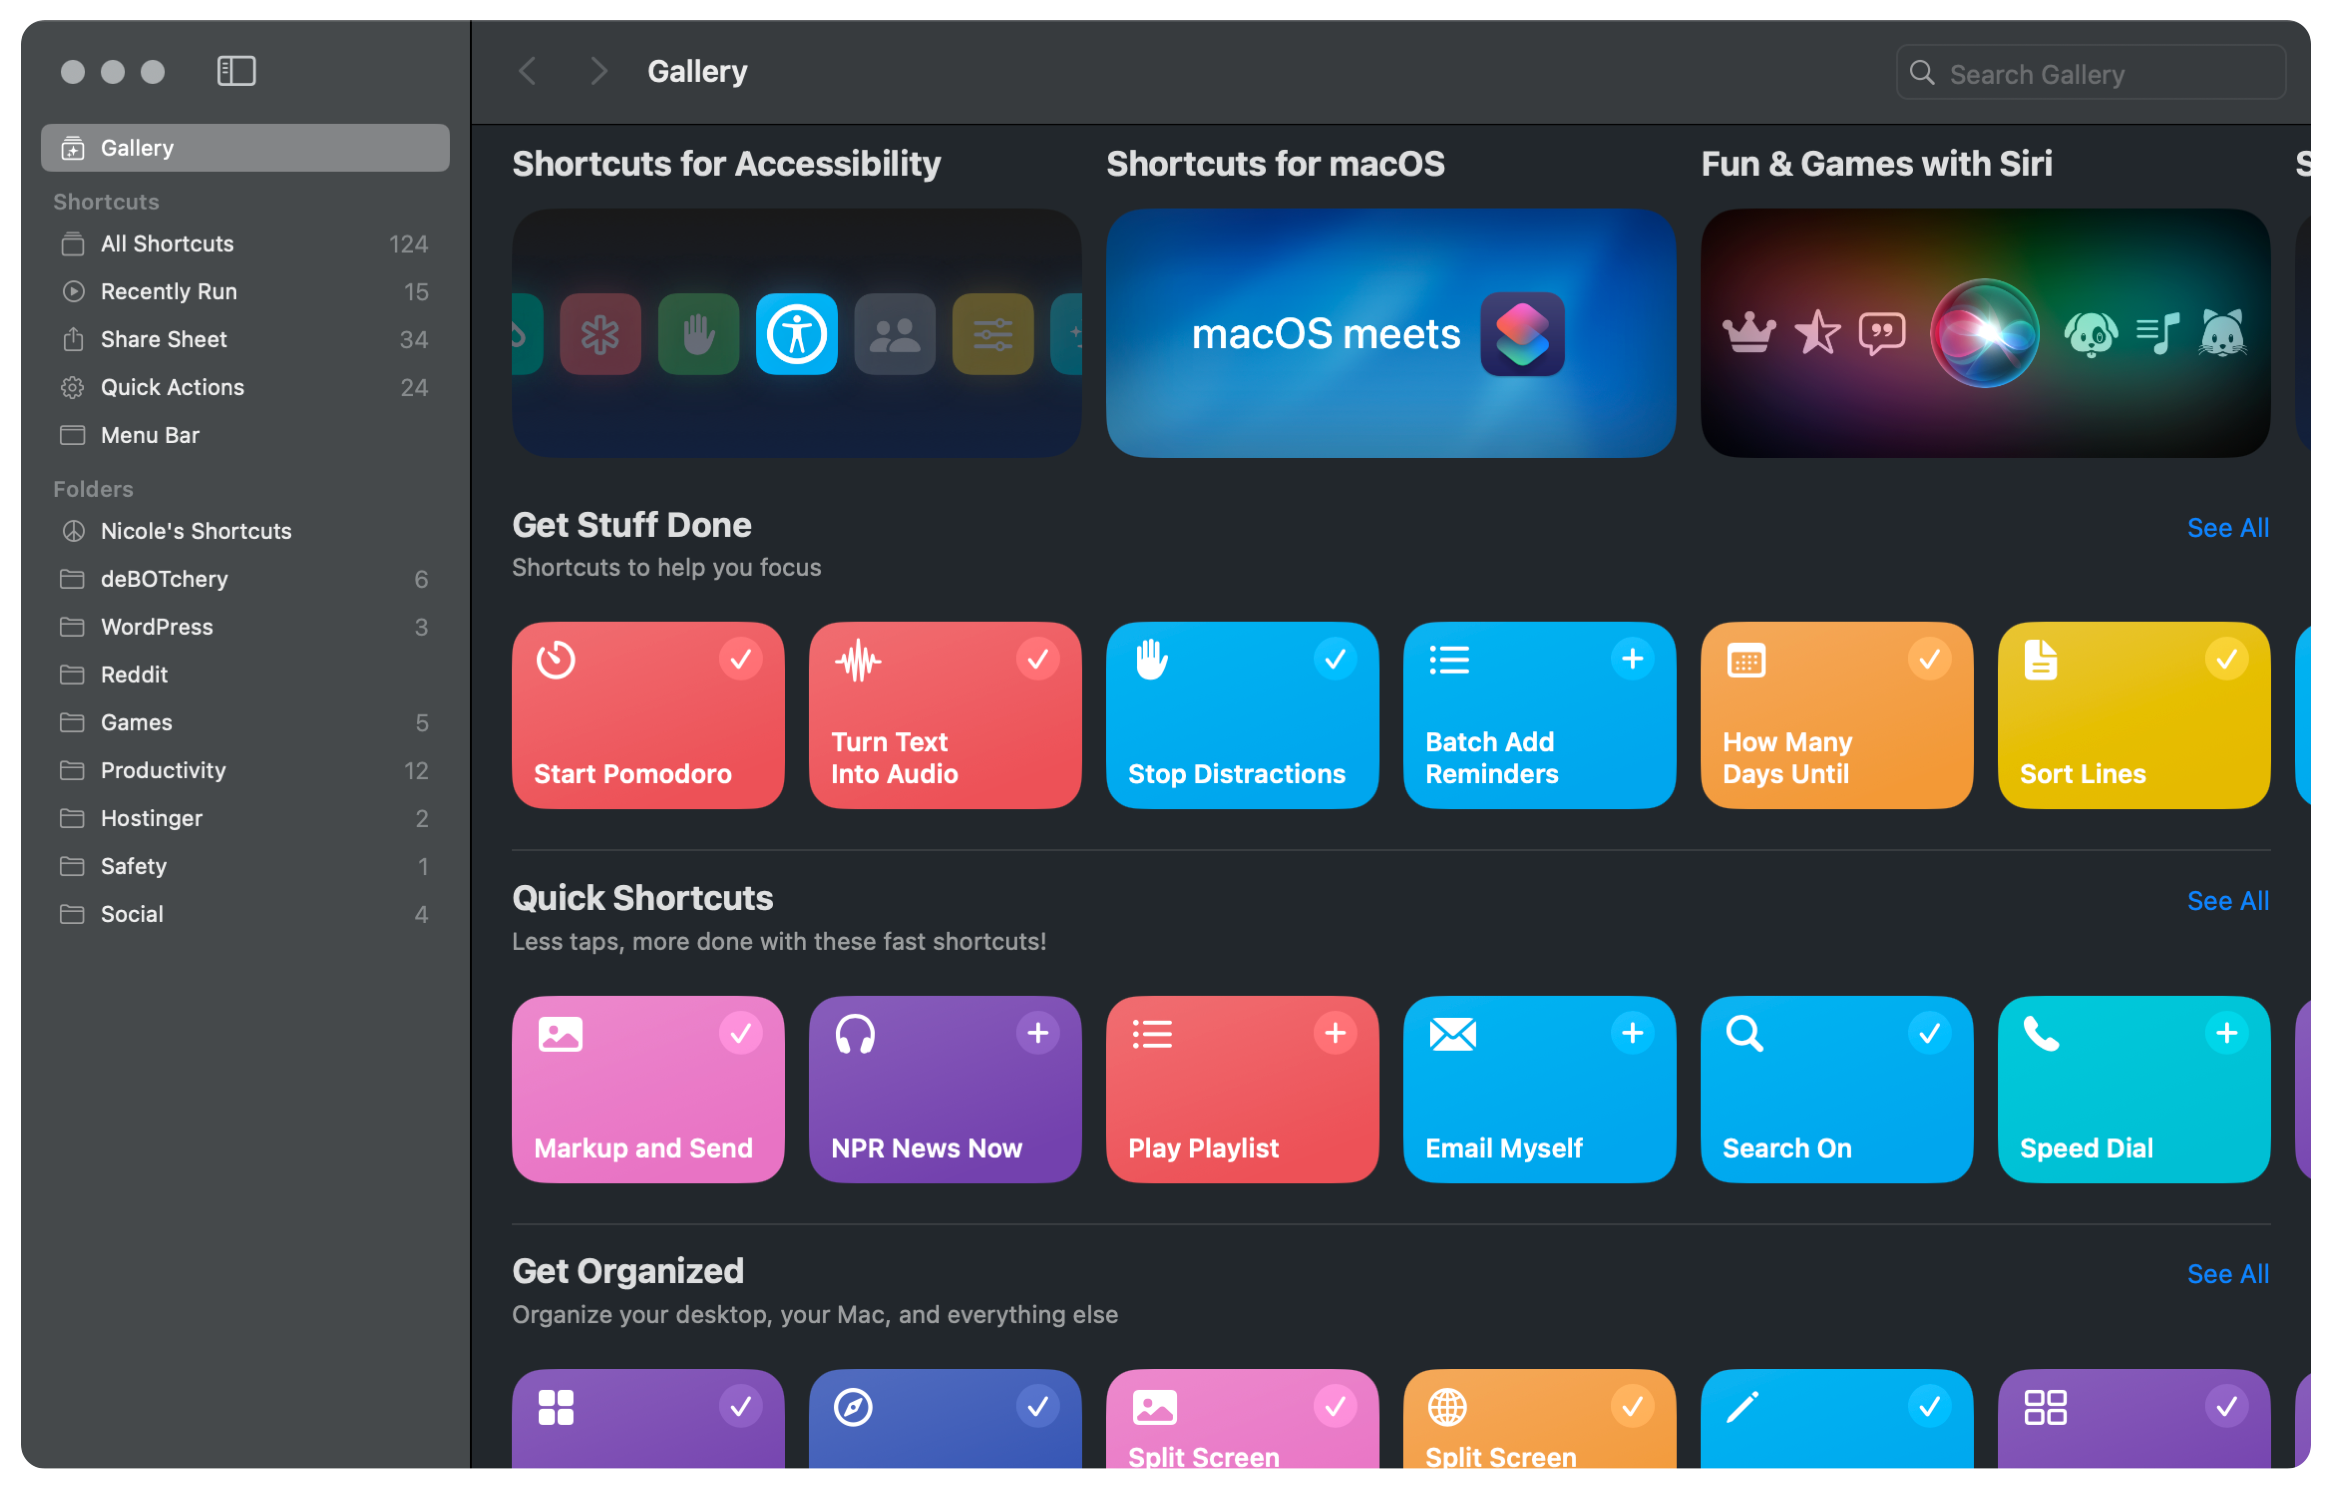
At the top of the Shortcuts navigation pane is the Gallery, which is Apple’s little gift to get you going in the Shortcuts world. Some of them are useful. Most will have you searching for a use case in your mind—and that’s okay.
I’m going to be talking a lot more about figuring out what to make in Shortcuts, and actually making it your own. But take some time to browse through the Gallery!
On the left sidebar is a navigation pane where you can explore your organized Shortcuts. I highly recommend organizing them.
What’s in a Shortcut?

First, peep the Shortcuts themselves. Each can be configured with its own color and little icon. Cute! Although I’d really love to see totally custom colors.
In short, Shortcuts are scripts. When you run a Shortcut, you’re telling the Shortcuts app to execute commands to different apps or web services in order to make things happen.
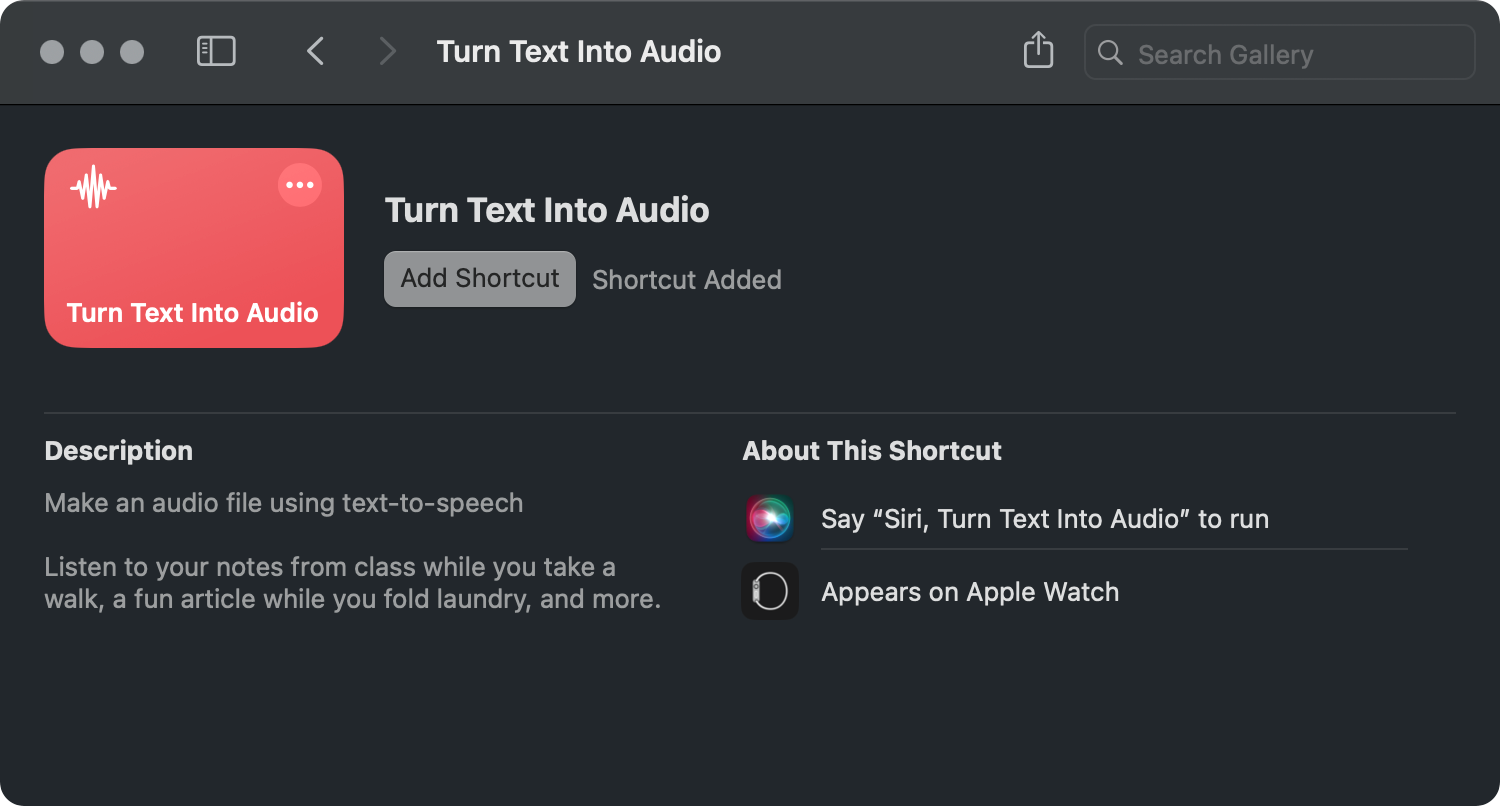
Go ahead and click on any Shortcut in the Gallery to open its info page.
Here, you can see all the information about the Shortcut, like what it does, and how to run it. If the Shortcut supports Apple Watch, that will show as well.
select the … icon in the top-right corner. The Shortcut will open in a separate window.
At the heart of Shortcuts are actions. Actions are pre-defined steps (created by Apple or app developers) that allow Shortcuts to control the apps you use.
Each action has clearly defined parameters, including:
Input: What data the action expects you to give to it to process
Output: What data the action gives you back after processing
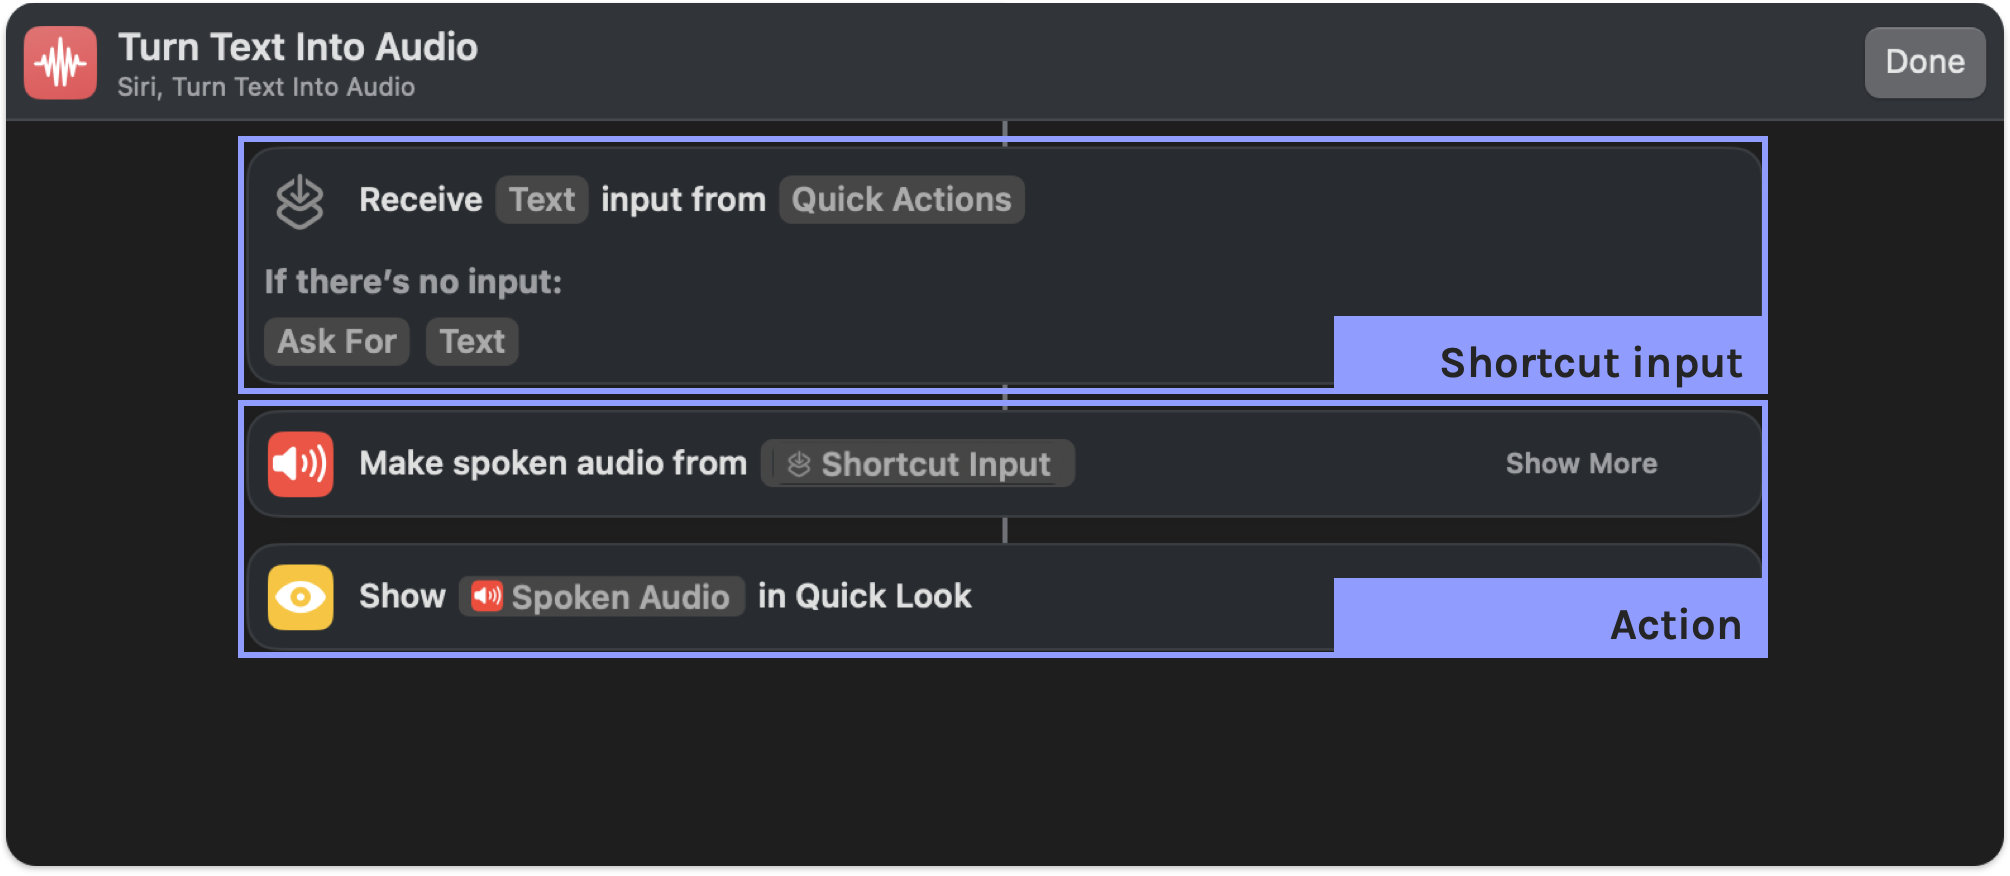
If you give an action step something it’s not expecting, it won’t do what you want. So, you want to be sure to read each action’s Info panel for details to ensure you understand how to use it.
We’ll dig into actions more shortly—but for now, know that this is what the inner world of the Shortcut looks like.
The Shortcut editor
No reason not to just jump right on in, yeah? Best way to learn!
Head back to the main screen (⌘0 from any window in Shortcuts) and click the + button at the top to create a new Shortcut from scratch. This will take you to a blank screen in the Shortcut editor.
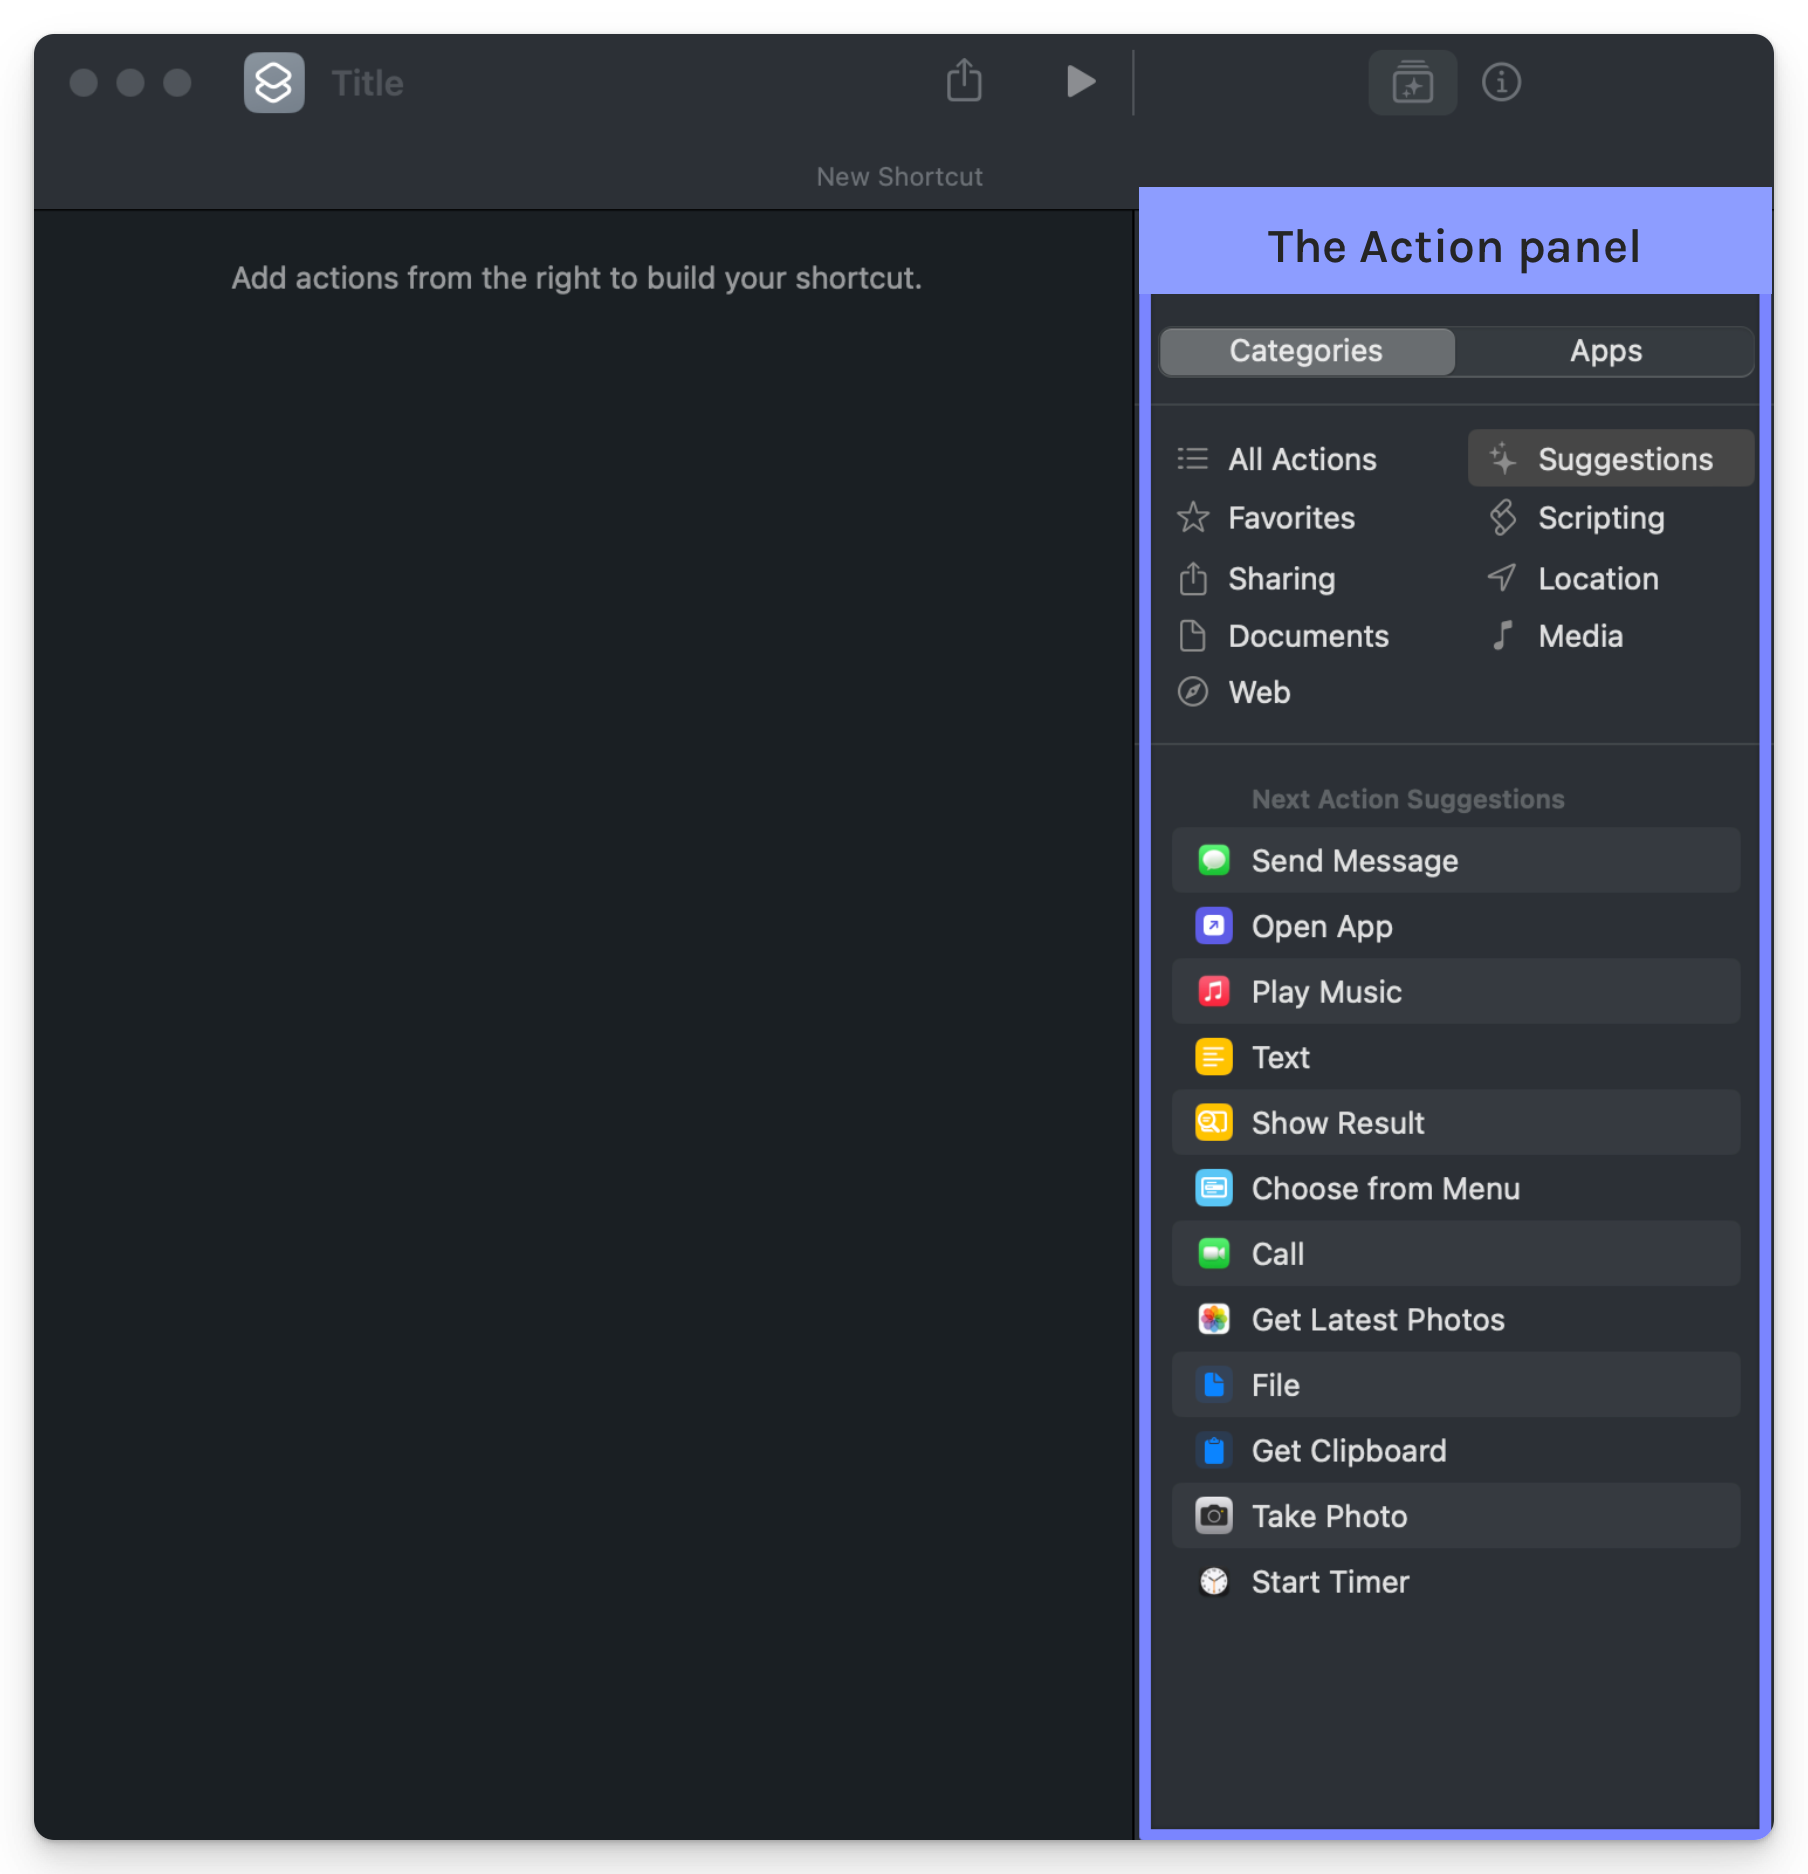 On the right-hand side, you’ll see a new section: the Actions panel. This is where you’ll find all your actions to use while building your Shortcut. They’re organized by category.
Take a moment to go through them and familiarize yourself. Every action has an info box that will tell you how to use it, including what kind of input and output it expects/produces.
Reading this information carefully can help avoid lots of frustration in the future when you realize you were just using something the wrong way. ????
Now, let’s add your first action. What type of Shortcut should we make? Ah, I have an idea…
Practice Shortcut: Create an alert notification
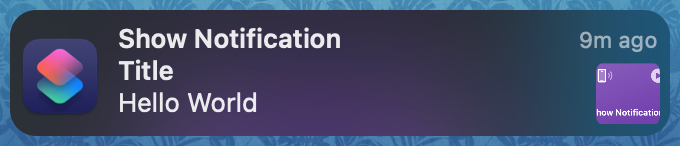
For our very first Shortcut, we’re going to build one that will trigger a notification on your phone—you know, like the kind you see on your lock screen, or that appear momentarily at the top of your screen when someone likes your post.
What will the notification say? We’re going to configure our Shortcut so that it will prompt us for the text to show each time before rendering the notification.
To accomplish this task, we’ll use the Show Notification action. Let’s break down the image above.
- First, what does it do? This action displays a local notification on your device.
- As input, it accepts text. This is the basis of any notification: text. I wish this was clearer, but it makes sense, right?
- As output (result), it produces… the input.
In other words, it renders a notification with whatever you passed to the action as input. (Thanks, Apple—clear as mud to newbies)
Note: It’s good for you to see these little oddities, because there are lots of these types of convoluted action descriptions and I hope that Apple reads this and improves them! Because it’s no good to you to only show you the “pretty” or “straightforward” actions when they literally show up like this in the app. ????
Now, go ahead and add that action to your Shortcut. Once the action is in your Shortcut, you’ll see the other options our verbose action info was trying to tell us about in so many words.
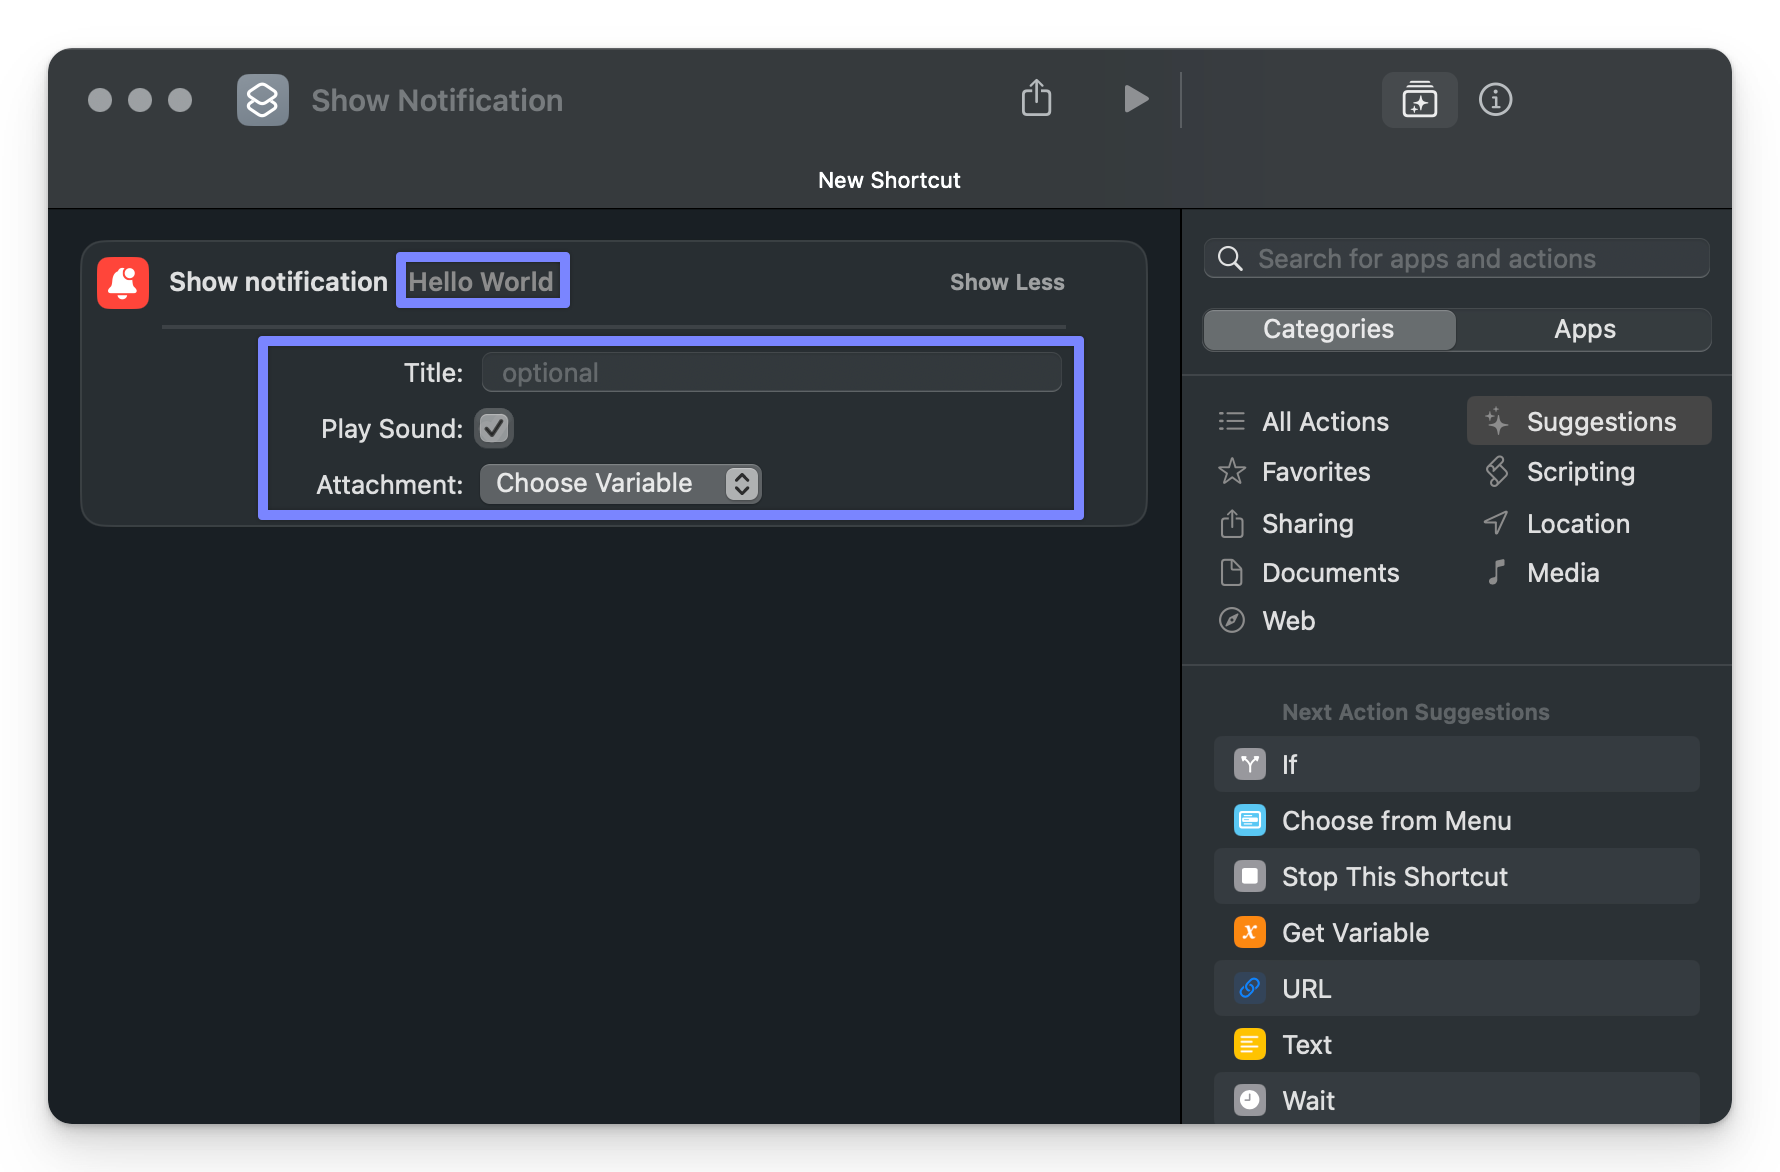
Each of these fields matches up to your notification. Let’s take a closer look.
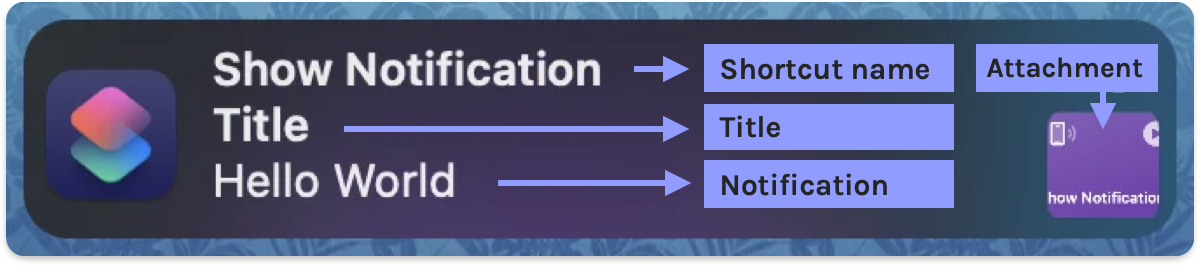
Fill in your notification text however you like. We’re not going to worry about an attachment for now—let’s just see the notification show up.
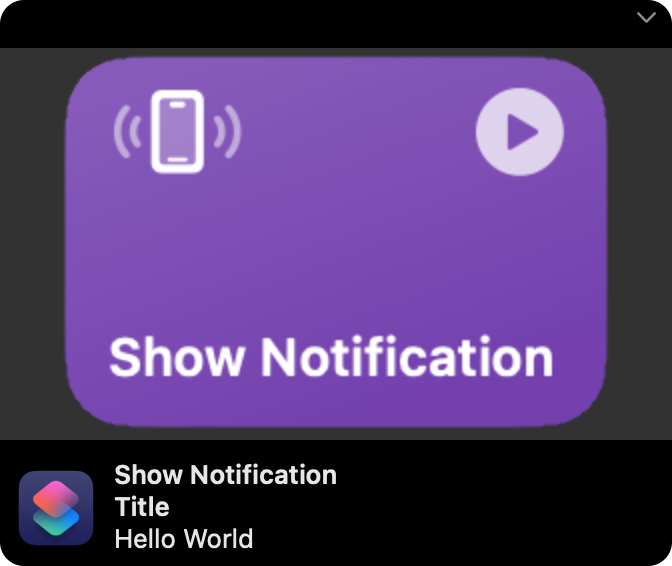
When you’re done, give it a run by hitting the Run button in the Shortcut editor.
Extending your Shortcut with Control Flow actions
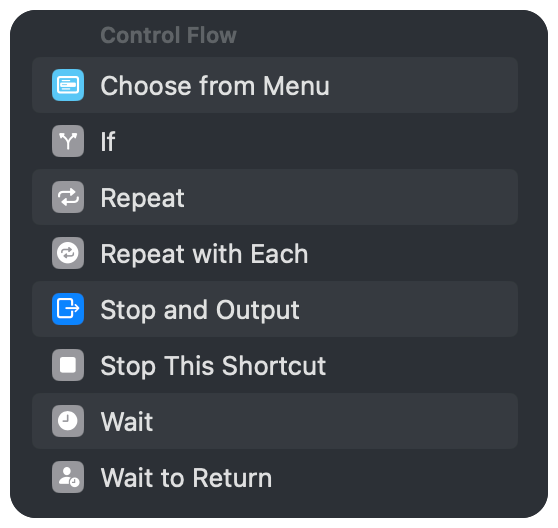
In addition to simple “do something” actions, there are also actions that help you control your Shortcut’s flow. These are called control flowIn programming, control flow refers to the order in which individual instructions, statements, or function calls are executed or evaluated in a script or program. It is essentially the roadmap that dictates how a program moves through different tasks, determining which actions are performed and when. Control flow allows a program to make decisions, repeat tasks, and respond to various conditions dynamically. actions, and you can find them under the Scripting category of the Action pane.
(Fun fact: these are all programming principles! When you start to use them, you are officially learning programming principles.)
Let’s take a look at these actions, which I’ll highlight by how you’d use them.
Repeating actions
Sometimes, you’ll want to repeat an action multiple times. There’s no need to drag the same action into the box multiple times, though. In programming, we call this principle “D.R.Y”—or “Don’t Repeat Yourself”.
Instead, plop in a handy Repeat or Repeat with Each action, and anything you put inside it and its end marker can be repeated a specific number of times, or as many times as needed to get through a list of items.
Conditional actions
What if you want to run an action only if a particular condition is true? For these cases, you’ll use the If action.
This action tests if a condition is true, and if so, it runs the Shortcuts actions inside it. If not, it skips to another part: Else.
Variable-based actions
Let’s say you reference the color “blue” a lot in your Shortcut. Then, you want to change it to “green”. If you mention it once, this might not be a problem… but now you have tons of places to update it, and it’s a pain.
To solve this problem, Shortcuts offers Set Variable, Add to Variable, and Get Variable actions.
These actions allow you to store data of any kind, and use it later in the Shortcut. Think of it like a bucket for your information.
And for the case above, they can be named, which makes organizing your references a breeze. No more “blue” or “green” value. Instead, create a variable named color with “blue” or “green” as the value. You’ll always know where to look for it, and there’s only one place to change the value.
Combining conditions and loops
Want to take it a step further? You can even combine If statements with Repeat actions to create more complex workflows.
For instance, you might use Repeat with Each to loop through a list of calendar events, and inside that loop, add an If statement to check if the event is happening today, performing different actions based on the result.
Debugging your Shortcuts
If your Shortcut doesn’t work, you may encounter the second annoying part of the native Shortcuts app after those verbose info boxes with 200-character inputs: it doesn’t have native error handling.
This means that if you have a bug in your Shortcut, you’re going to need to set up some actions to alert you to when you hit snags. The app won’t do it for you.
This is pretty standard in the programming world, but if you’re new to all things programming, it may come as somewhat of a shock.
What, it just didn’t work? And it didn’t say anything about why?
Nope. And this is a design, not a bug.
I’ll be doing more writings on debugging in Apple Shortcuts, but for now, this Shortcut should be simple enough to have resulted in a nice little pop-up that gives you some text of your choice.
But in general, in absence of this native error handling, these are the tools available to you that you can use to troubleshoot your Shortcut, like:
- Show Alert: This action will pop up an alert notification, which is very useful when you start venturing into advanced Shortcuts using if/then logic statements.
- Show Result: Similar to Show Alert, this action pops up the result of whatever is passed into it.
- Stop Shortcut: This action stops the Shortcut entirely, which can be used to isolate your Shortcut and keep it from running past a point you need to work on.
If your text isn’t rendering the way you expect it to, I also recommend using Text actions to organize and parse text, then use Show Result to render the results.
What to do next
Now that you’ve built your first Shortcut, play around! Seriously: the best way to see what it can do is by digging around in the Actions to see what you could use.
Ask yourself: What apps do you use? If they support Shortcuts, they’ll have actions listed in the Actions panel.
(No actions? No problem!—but achieving that is going to require a bit more developer skill, and more teaching APIs on my part. ???? Check out the first post in my Extending Apple Shortcuts with APIs series!)
If you’re interested in learning more about Shortcuts, follow the blog for more information and resources. There is much to cover, and I’ll do my best!
